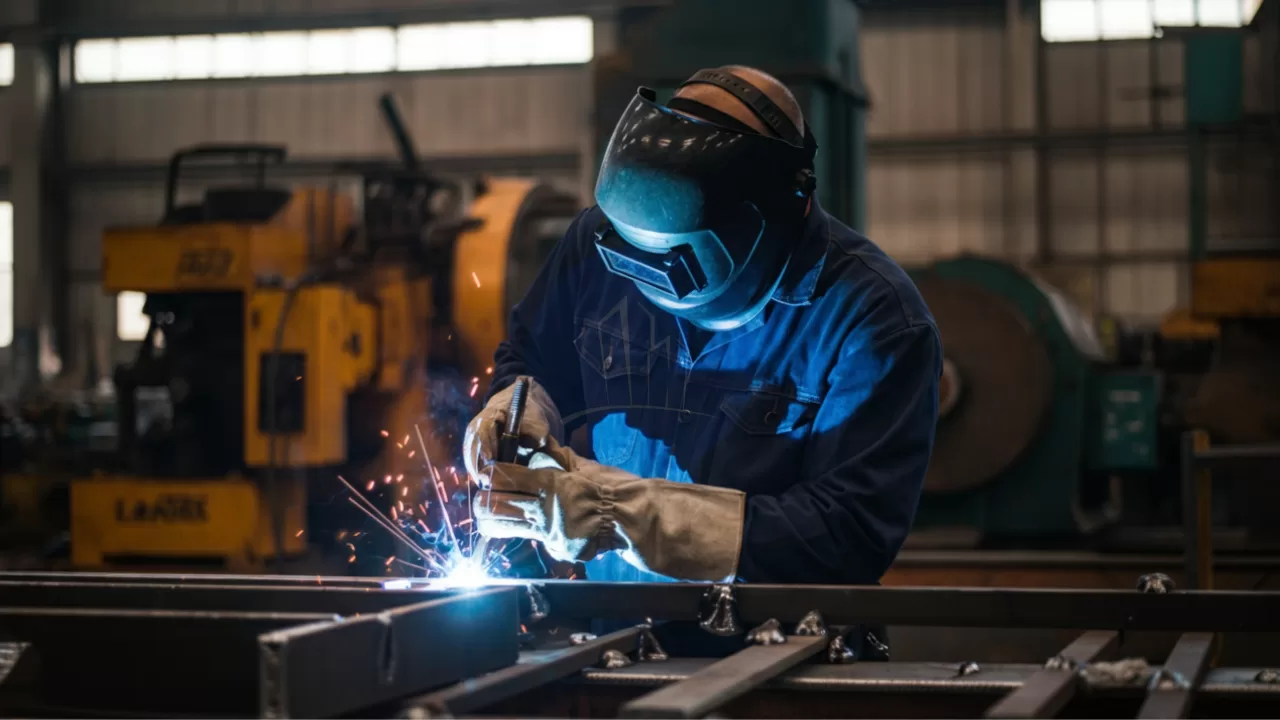
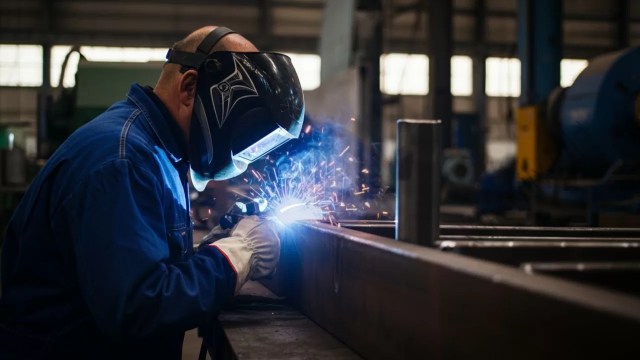
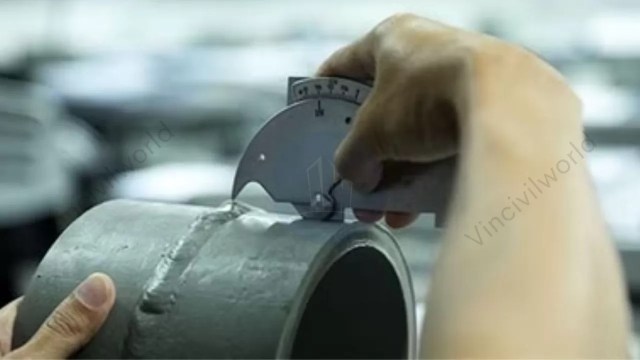
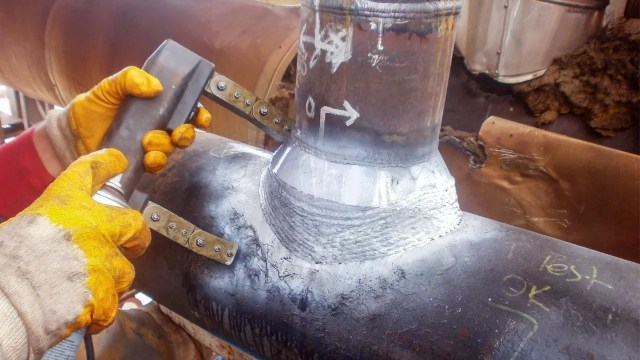
Weld inspection is crucial for ensuring the quality and safety of welded joints. This applies across various industries, including construction, automotive, and manufacturing. This critical process verifies that welds meet rigorous industry standards, identifying any defects that compromise performance or safety. Weld inspection combines visual inspection with advanced non-destructive testing (NDT) methods, such as radiography and ultrasonic testing, to detect surface and subsurface flaws. Certified Welding Inspectors (CWIs) are accredited by organizations like the American Welding Society (AWS) or CSWIP. They play a key role in overseeing these inspections. They also uphold quality standards.
In this comprehensive guide, we’ll simplify the weld inspection process. This includes understanding the importance of welder qualifications and certifications. It also covers both destructive and non-destructive testing techniques. We’ll explore essential inspection methods, such as magnetic particle inspection for ferromagnetic materials and liquid penetrant inspection for non-magnetic metals, as well as advanced tools like weld gauges and ultrasonic testers. Whether you’re a quality control professional or you have an interest in welding standards, this guide will offer valuable insights. These insights will help you maintain the integrity and reliability of welded structures. Join us to learn how effective inspection practices enhance safety, prevent potential failures, and extend the life of critical infrastructure.
Table of contents – Weld Inspection
Significance of Weld Inspection
Weld inspection is essential for ensuring the quality, safety, and longevity of welded structures. Its importance spans various aspects:
- Competitive Advantage: Companies that prioritize rigorous weld inspection enhance their reputation. They become more competitive by offering safer, more durable products. This makes weld inspection a strategic investment in quality and safety.
- Structural Integrity and Safety: Weld inspections are crucial as welded joints undergo considerable stress. High-quality welds are necessary to prevent catastrophic failures, which could lead to property damage, financial loss, or even endanger lives.
- Compliance with Standards: Different industries, such as aerospace, construction, automotive, and manufacturing, have strict standards for weld quality. Inspections ensure adherence to these standards, fostering product reliability and consumer trust.
- Economic Benefits: Early detection of weld defects reduces repair costs. It also lowers the likelihood of product recalls. This leads to improved operational efficiency and cost savings for businesses.
Types of Weld Inspection Methods
Weld inspection methods can be broadly categorized into two main types: destructive testing (DT) and non-destructive testing (NDT). Each method serves a unique purpose. The selection is based on the project’s specific requirements and the materials involved. Understanding these methods is crucial for ensuring that welds meet the necessary standards and perform effectively in their intended applications.
- Destructive testing
- Non – Destructive testing
Destructive testing (DT)
Destructive testing involves testing a welded sample to its failure point to understand its mechanical properties and behavior. This type of inspection provides valuable data on the strength and ductility of the weld. However, it destroys the sample in the process. Common destructive testing methods include tensile tests, bend tests, and impact tests. DT is useful for validating the properties of a weld. It is often used during the qualification of welders. However, it is less practical for routine inspections because it sacrifices the sample being tested.
Non Destructive Testing (NDT)
In contrast, non-destructive testing methods allow for the assessment of weld quality without causing any damage to the welded structure. NDT techniques include visual inspection, ultrasonic testing, Radiographic testing, magnetic particle testing, and dye penetrant testing, among others. These methods are crucial for ongoing quality control. They enable inspectors to detect surface and subsurface defects. This is accomplished without compromising the integrity of the weld. The choice of NDT method depends on various factors. These factors include the type of material, the size and complexity of the weld, and the specific defects that need to be identified.
Types of Weld Inspection
The most common types of Weld Inspection are as follows
- Visual Inspection of welds
- Non-Destructive Testing (NDT) Methods for Weld Inspection
- Destructive Testing (DT)
Visual Inspection of Welds
Visual inspection is one of the most fundamental and widely utilized methods of weld inspection. It serves as the first line of defense in identifying potential defects and ensuring welding quality. This method involves a thorough examination of the weld surface. Inspectors look for irregularities such as cracks, porosity, undercutting, and inadequate reinforcement. Trained personnel can perform visual inspections using only their eyes. They may also use magnifying tools to enhance the visibility of finer details.
The effectiveness of visual inspection largely depends on the inspector’s experience and knowledge of welding processes. A skilled inspector can often detect issues that may not be immediately apparent. They provide valuable insights into the overall quality of the weld. Additionally, visual inspections can be conducted quickly and cost-effectively, making it an attractive option for routine assessments. However, while visual inspection is crucial, it has its limitations. It can’t detect subsurface defects. It also can’t provide detailed information about the weld’s mechanical properties.
To enhance the accuracy of visual inspections, inspectors use specific guidelines and checklists. This practice ensures that all critical aspects are evaluated. These guidelines may include checking for proper weld size, surface finish, and alignment. They also ensure that the weld meets the specified design and engineering requirements. Proper documentation of visual inspections is crucial. It provides a record of the inspection process. Proper documentation also notes any identified issues, which can be invaluable for future reference and quality assurance.
Non-Destructive Testing (NDT)
Non-destructive testing (NDT) methods are essential in the weld inspection process. They allow for the evaluation of welded joints without causing any damage. These techniques are vital for identifying both surface and subsurface defects, ensuring the integrity and reliability of the welds. Various NDT methods are employed, each with its unique advantages and applications.
Ultrasonic testing (UT).
One of the most commonly used NDT methods is ultrasonic testing (UT). This technique utilizes high-frequency sound waves to detect internal flaws in a weld. The sound waves are transmitted through the material. Any discontinuities, such as cracks or voids, reflect the waves back to the transducer. Ultrasonic testing (UT) is highly effective for assessing the thickness of welds. It also detects subsurface defects. This makes it a preferred choice in industries such as aerospace and manufacturing.
Radiographic testing (RT)
Radiographic testing (RT) is another widely used NDT method. It involves using X-rays or gamma rays to produce images of the internal structure of a weld. This method allows inspectors to visualize the presence of defects and discontinuities that may not be visible on the surface. While RT provides detailed images, it requires specialized equipment and trained personnel to interpret the results accurately. Additionally, safety precautions must be taken due to the exposure to radiation.
Magnetic particle testing (MT) and dye penetrant testing (PT)
Magnetic particle testing (MT) and dye penetrant testing (PT) are other notable NDT methods wherein Magnetic particle Testing is used for ferromagnetic materials. It involves applying a magnetic field to the weld. Then, iron particles are applied. Defects will interrupt the magnetic field and attract the particles, indicating their presence.
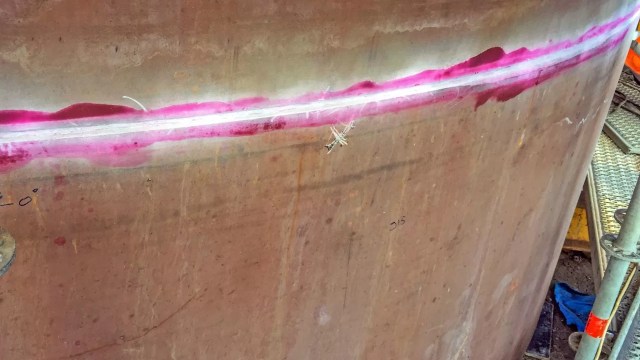
Dye Penetration Test (DPT), on the other hand, involves applying a dye to the surface of the weld. The dye seeps into any cracks or defects. When a developer is applied, the dye becomes visible, revealing the location of the flaws. Each NDT method has its unique strengths. Methods are selected based on the project requirements and the materials involved.
Destructive Testing Methods
Destructive testing (DT) methods are employed to assess the mechanical properties of welded joints. These methods evaluate the overall quality by subjecting them to extreme conditions until failure occurs. These methods are less common for routine inspections because they damage the sample. However, they provide invaluable data. This data is crucial for validating the welding process and ensuring that it meets the required standards. Let us have a brief look at some of the the Destructive testing methods
Tensile test
One of the primary methods of destructive testing is the tensile test. In this procedure, a sample of the welded joint is pulled apart until it breaks. The results provide critical information about the tensile strength, yield strength, and elongation of the weld. Welding Inspectors can assess how well the weld can withstand tension during its service life. This information is essential for applications where high stress is expected, such as in structural components.
Bend test
Another important destructive testing method is the bend test. This technique involves bending a welded sample. The sample is bent to a specified angle to evaluate its ductility. It also assesses the quality of the weld. The test helps in determining if the weld can withstand deformation without cracking. It provides insights into both the weld metal and the heat-affected zone. The bend test is particularly useful for evaluating the overall soundness of the weld. This makes it a preferred choice in many industries.
Impact Testing
Impact testing is also a crucial destructive testing method, especially in applications where welds may experience sudden shocks or impacts. This test measures the energy absorbed by a material during fracture and helps assess its toughness at different temperatures. Engineers can ensure reliable performance of welded structures in real-world situations. They achieve this by understanding how a weld behaves under impact conditions. Destructive testing methods involve sacrificing samples, but the data obtained is invaluable. It is crucial for the qualification of welders and the continuous improvement of welding processes.
Standards and Regulations for Weld Inspection
Weld inspection standards and regulations ensure quality and safety across industries by establishing consistent evaluation criteria and compliance requirements. Here are key standards and industry-specific guidelines:
Key Weld Inspection Standards and Regulations
- American Welding Society (AWS)
- AWS D1.1: Governs welding steel structures.
- AWS D1.5: Standards for bridge welding.
- American Society of Mechanical Engineers (ASME)
- ASME Section IX: Focuses on welder and procedure qualifications.
- International Organization for Standardization (ISO)
- ISO 3834: Specifies quality requirements for fusion welding.
- ISO 17635: Guidelines for inspection and testing of welds.
- Industry-Specific Standards
- AS9100: Aerospace quality management system for inspection.
- API Standards (American Petroleum Institute): Applied in oil and gas for weld integrity on pipelines and equipment.
Understanding and following these standards helps ensure compliance, quality assurance, and safety in welding practices across sectors.
Weld Inspection Process and Best Practices
The weld inspection process is a systematic procedure that encompasses various stages, from planning and preparation to execution and documentation. By following established best practices, inspectors can ensure that welds are thoroughly evaluated and that any defects are identified and addressed promptly. This structured approach is essential for maintaining high-quality standards in welding operations.
Planning and Preparation
- The first step in the weld inspection process is to review the project specifications and welding procedures. This includes understanding the materials used, the types of joints being welded, and the applicable codes and standards. By familiarizing themselves with these details, inspectors can develop a tailored inspection plan that aligns with the specific requirements of the project. This preparation phase is crucial for ensuring that the inspection is comprehensive and focused on the critical areas of concern
Pre-Weld Inspection
- Evaluate Work Environment: Before welding begins, a pre-weld inspection is conducted to assess the workspace and safety conditions. This includes evaluating environmental factors such as lighting, ventilation, and cleanliness to ensure they meet quality standards for welding.
- Check Materials and Equipment: Inspectors assess the materials and welding equipment for integrity and functionality. This involves confirming the absence of contaminants, rust, or surface damage on materials and ensuring equipment settings comply with the project specifications.
- Fit-Up and Joint Alignment: Proper fit-up, alignment, and spacing of welding components are verified. This step is essential, as improper alignment can lead to poor structural performance and potential failures.
In-Process Inspection
- Monitor Welding Technique: During welding, inspectors perform in-process checks to monitor adherence to welding procedures and standards. They observe factors like welding speed, heat input, and electrode angle to ensure consistency and quality.
- Prevent Defects with Immediate Corrections: Real-time oversight allows inspectors to identify and correct potential defects, such as undercuts or incomplete fusion, as they occur. Immediate intervention helps maintain quality and reduces rework costs.
Post-Weld Inspection
- Conduct Visual Inspection: A post-weld visual inspection is performed to identify surface flaws like cracks, porosity, and slag inclusions. This first level of inspection addresses visible issues before more complex testing is conducted.
- Non-Destructive Testing (NDT) or Destructive Testing (DT): Inspectors apply NDT techniques (e.g., ultrasonic, radiographic testing) to examine subsurface integrity without damaging the weld. When project requirements demand, DT methods (e.g., bend or tensile tests) are also used to evaluate weld strength and durability under various conditions.
Documentation and Compliance
- Record Findings and Actions Taken: Documentation of inspection findings, including identified defects and corrective actions, is essential. This record serves as proof of compliance with welding standards and provides a reference for future maintenance or inspections.
- Ensure Compliance with Standards: Compliance with industry standards (such as AWS, ASME, ISO) and any relevant project-specific codes is verified to ensure the weld meets legal and safety requirements. Adherence to these regulations helps safeguard quality and enhances stakeholder confidence.
This structured process and adherence to best practices ensure that welds are reliable, meet required standards, and maintain the structural integrity essential for the project’s success.
Common Weld Defects and How to Identify Them
Identifying common weld defects is a critical aspect of the weld inspection process, as these imperfections can compromise the strength and integrity of the welded joint. Understanding the types of defects that can occur and the methods to detect them is essential for maintaining high-quality welding standards. Some of the most prevalent weld defects include porosity, cracks, undercutting, and lack of fusion.
Porosity
Porosity refers to the presence of gas pockets trapped within the weld metal. These voids can weaken the weld and reduce its load-bearing capacity. Visual inspection is often the first step in identifying porosity, as it may appear as a rough or pitted surface.
Inspectors typically use advanced NDT methods, such as ultrasonic testing or radiographic testing, to detect subsurface porosity and provide a more comprehensive assessment of the weld.
Cracks
Cracks are another significant weld defect that can occur due to various factors, including excessive heat or improper cooling rates. These cracks may form on the surface or within the weld metal itself, leading to catastrophic failures if not addressed. Visual inspections can reveal surface cracks, while NDT methods like magnetic particle testing or dye penetrant testing can help identify subsurface cracks. It’s crucial for inspectors to evaluate the location and nature of cracks to determine their impact on the overall weld quality.
Undercutting
Undercutting occurs when the base metal is eroded along the edges of the weld, creating a groove that can significantly weaken the joint. This defect is often visible during visual inspections, as it creates a visible notch along the weld bead. Inspectors should also be trained to recognize lack of fusion, which happens when the weld metal does not properly adhere to the base material. Identifying these defects promptly is essential for ensuring that corrective actions are taken before the welded structure is put into service, thereby preserving its integrity and safety.
Conclusion and the Role of Weld Inspection in Ensuring Welding Quality
In conclusion, weld inspection is indispensable. It plays a vital role in ensuring the quality and safety of welded structures. The importance of thorough inspections cannot be underestimated, as they are essential for identifying defects, verifying compliance with industry standards, and ultimately preventing failures that could have severe consequences. The various inspection methods include both destructive and non-destructive techniques. These methods provide a comprehensive approach to evaluating weld quality. Inspectors use them to make informed decisions about the integrity of welded joints.
As industries continue to evolve, the demand for high-quality welding will only increase. With advancements in technology, weld inspection methods are becoming more sophisticated, allowing for greater accuracy and efficiency in detecting defects. Inspectors must stay informed about the latest developments in inspection techniques. They must adhere to the relevant codes and standards. This helps maintain the highest quality assurance levels. The continuous education and training of welding personnel are crucial in achieving this goal, ensuring that they are equipped with the knowledge and skills necessary to perform effective inspections.
Ultimately, the role of weld inspection extends beyond mere compliance. It represents a commitment to quality and safety. This commitment benefits the manufacturers, their clients, and society as a whole. By prioritizing weld inspections and fostering a culture of quality assurance, we can ensure that the structures we rely on are built to withstand the test of time. This dedication to excellence in welding practices will help create a safer and more reliable world for everyone.

